ModuleNotFoundError: No module named 'Crypto'
代码
1 | from Crypto.Cipher import PKCS1_v1_5 |
错误
1 | Traceback (most recent call last): |
解决
1 | pip3 uninstall crypto |
Python 之 Requests 参数格式
x-www-form-urlencoded
当 requests 的 content-typ 为 "content-type": "application/x-www-form-urlencoded; charset=UTF-8", 时请求参数当如下
1 | r = requests.post( |
json
当 requests 的 content-typ 为 "Content-Type": "application/json;charset=UTF-8", 时请求参数当如下
1 | r = requests.post( |
x-www-form-urlencoded 时应该为一个字典,json 时应该为一个 json 字符串
在群晖上利用 VMM 玩转旁路由之 LEDE
前记
19 年的时候准备用群晖来做软路由,由于双网卡配置失败遂放弃
在群晖上利用 Virtual Machine Manager 玩转软路由之 LEDE
因为把 AC86U 和 AC66UB1 都刷回了官方固件 386,所以就需要一个旁路由。既然单网卡的群晖做不了软路由,那就用来做旁路有吧
LEDE
镜像
在 K 站下载硬盘镜像后上传至 VMM
镜像下载地址:koolcenter.com
找到名为 openwrt-koolshare-mod-v2.36-r14941-67f6fa0a30-x86-64-generic-squashfs-combined.vmdk 的虚拟机磁盘,下载后上传至 VMM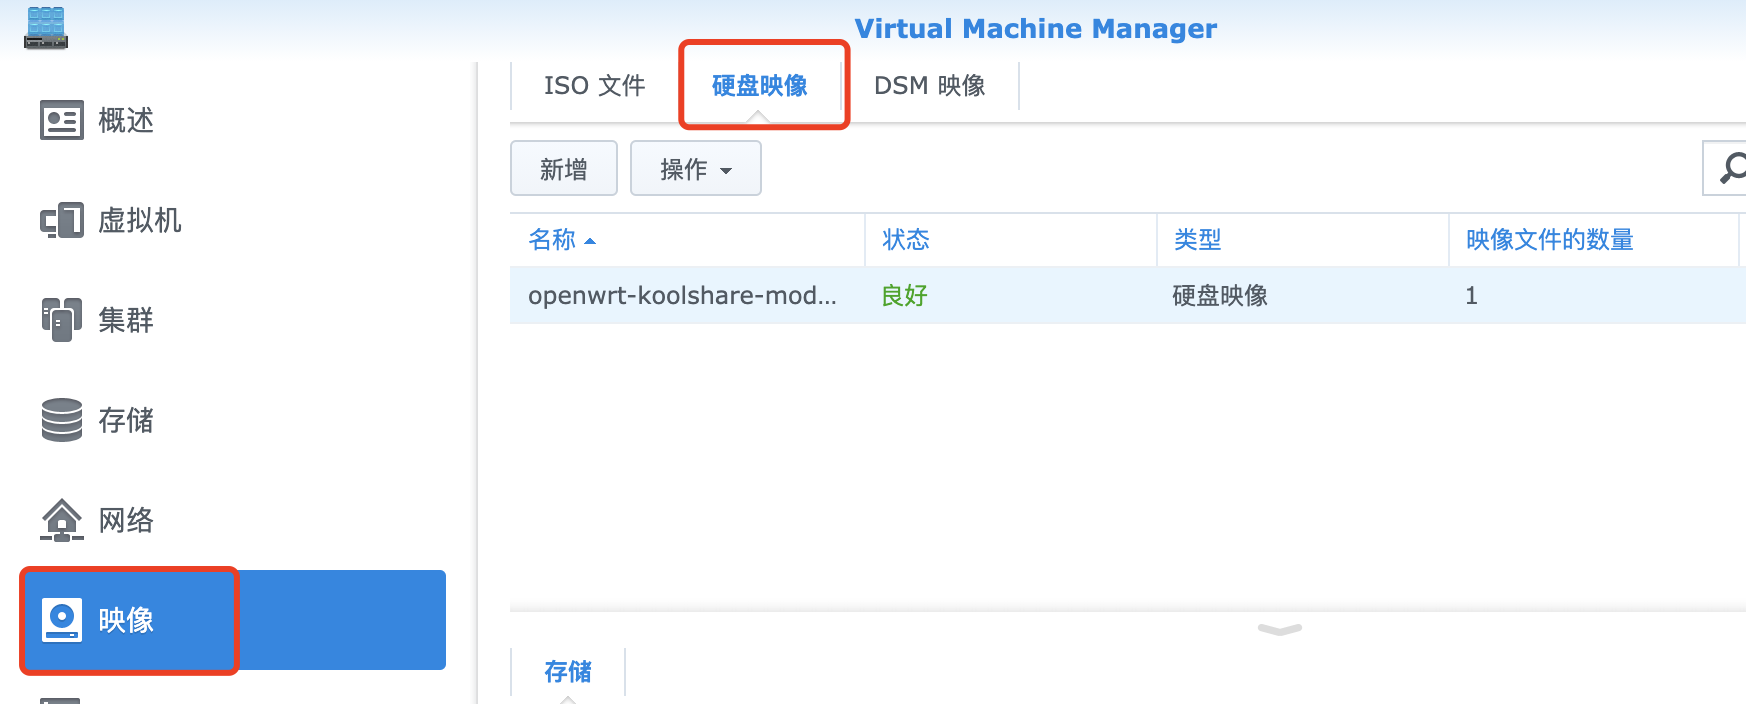
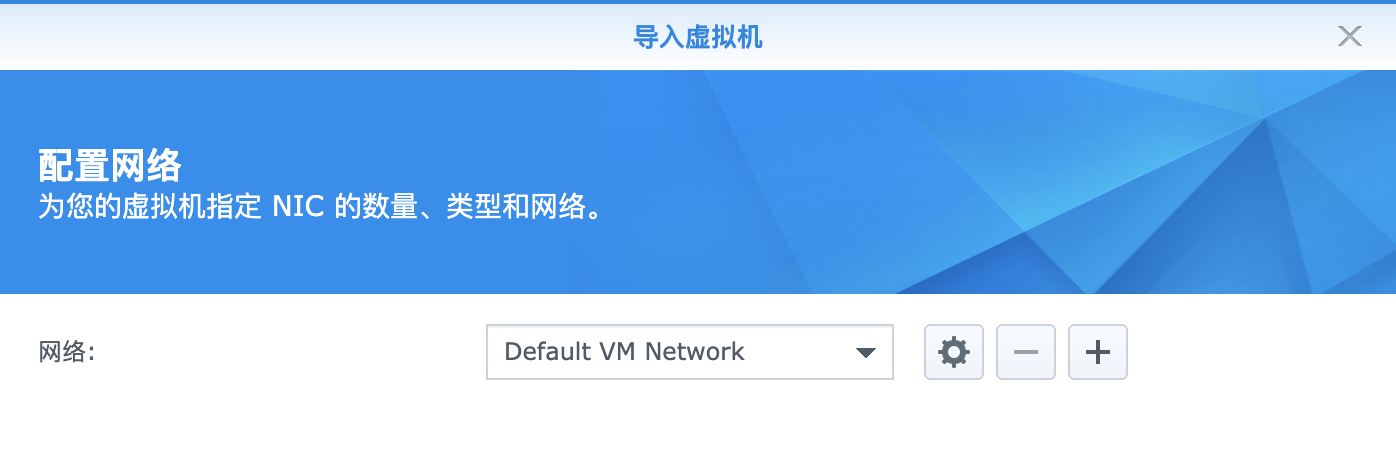
网络
网络这里我们直接使用 Default VM Network 即可
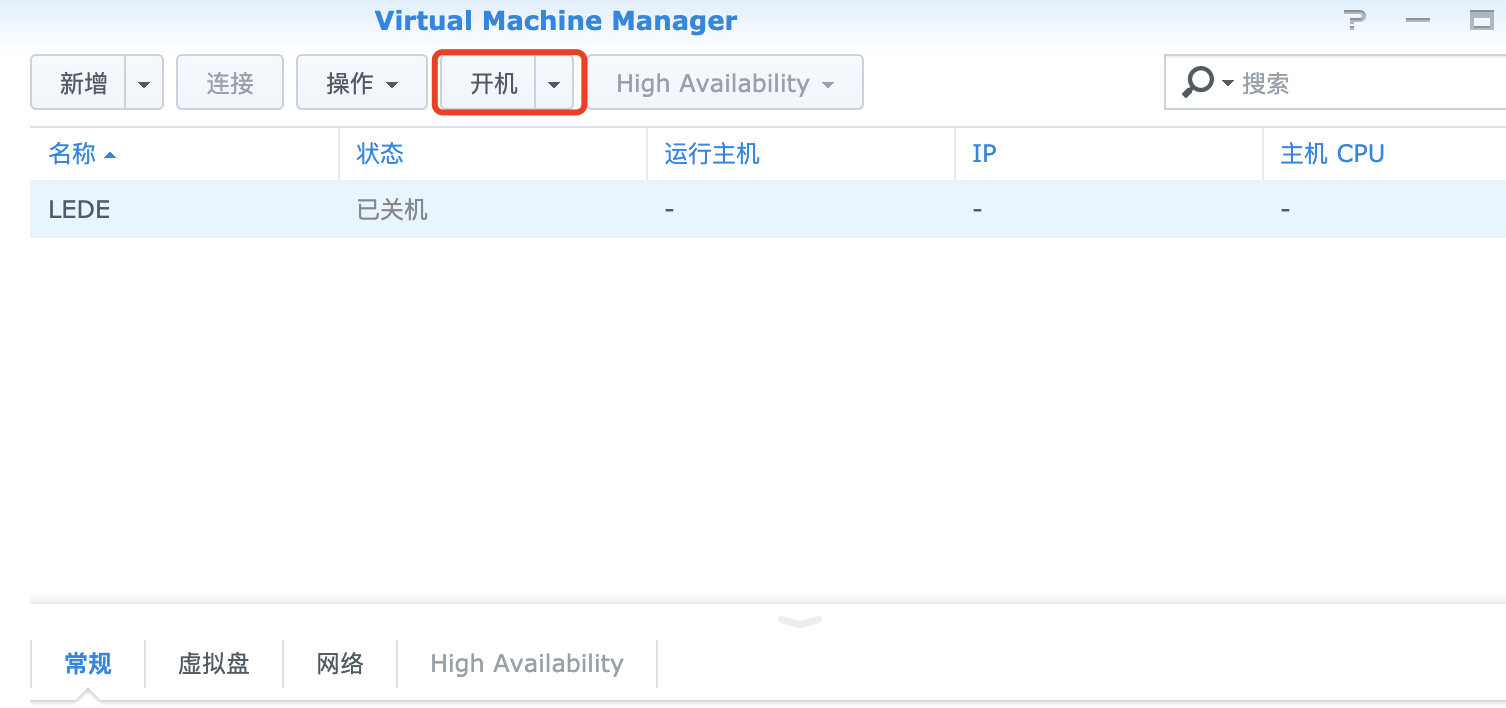
开机
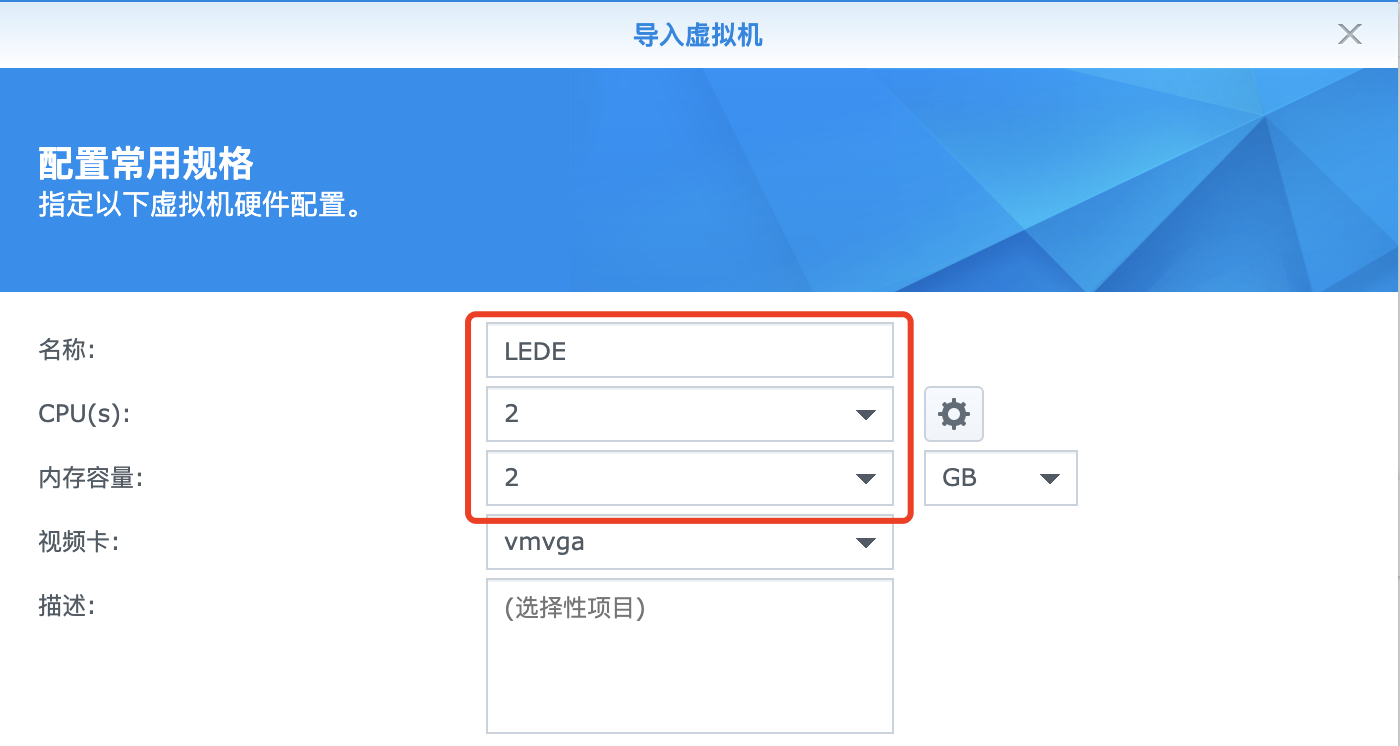
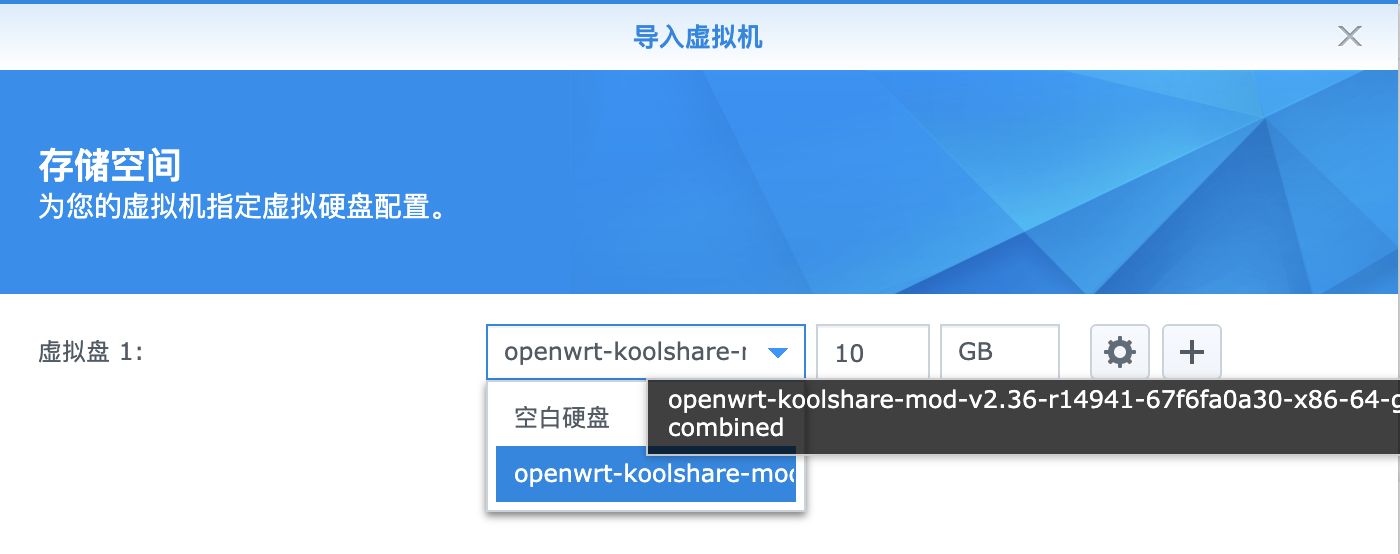
导入虚拟机
通过之前下载的虚拟机磁盘导入虚拟机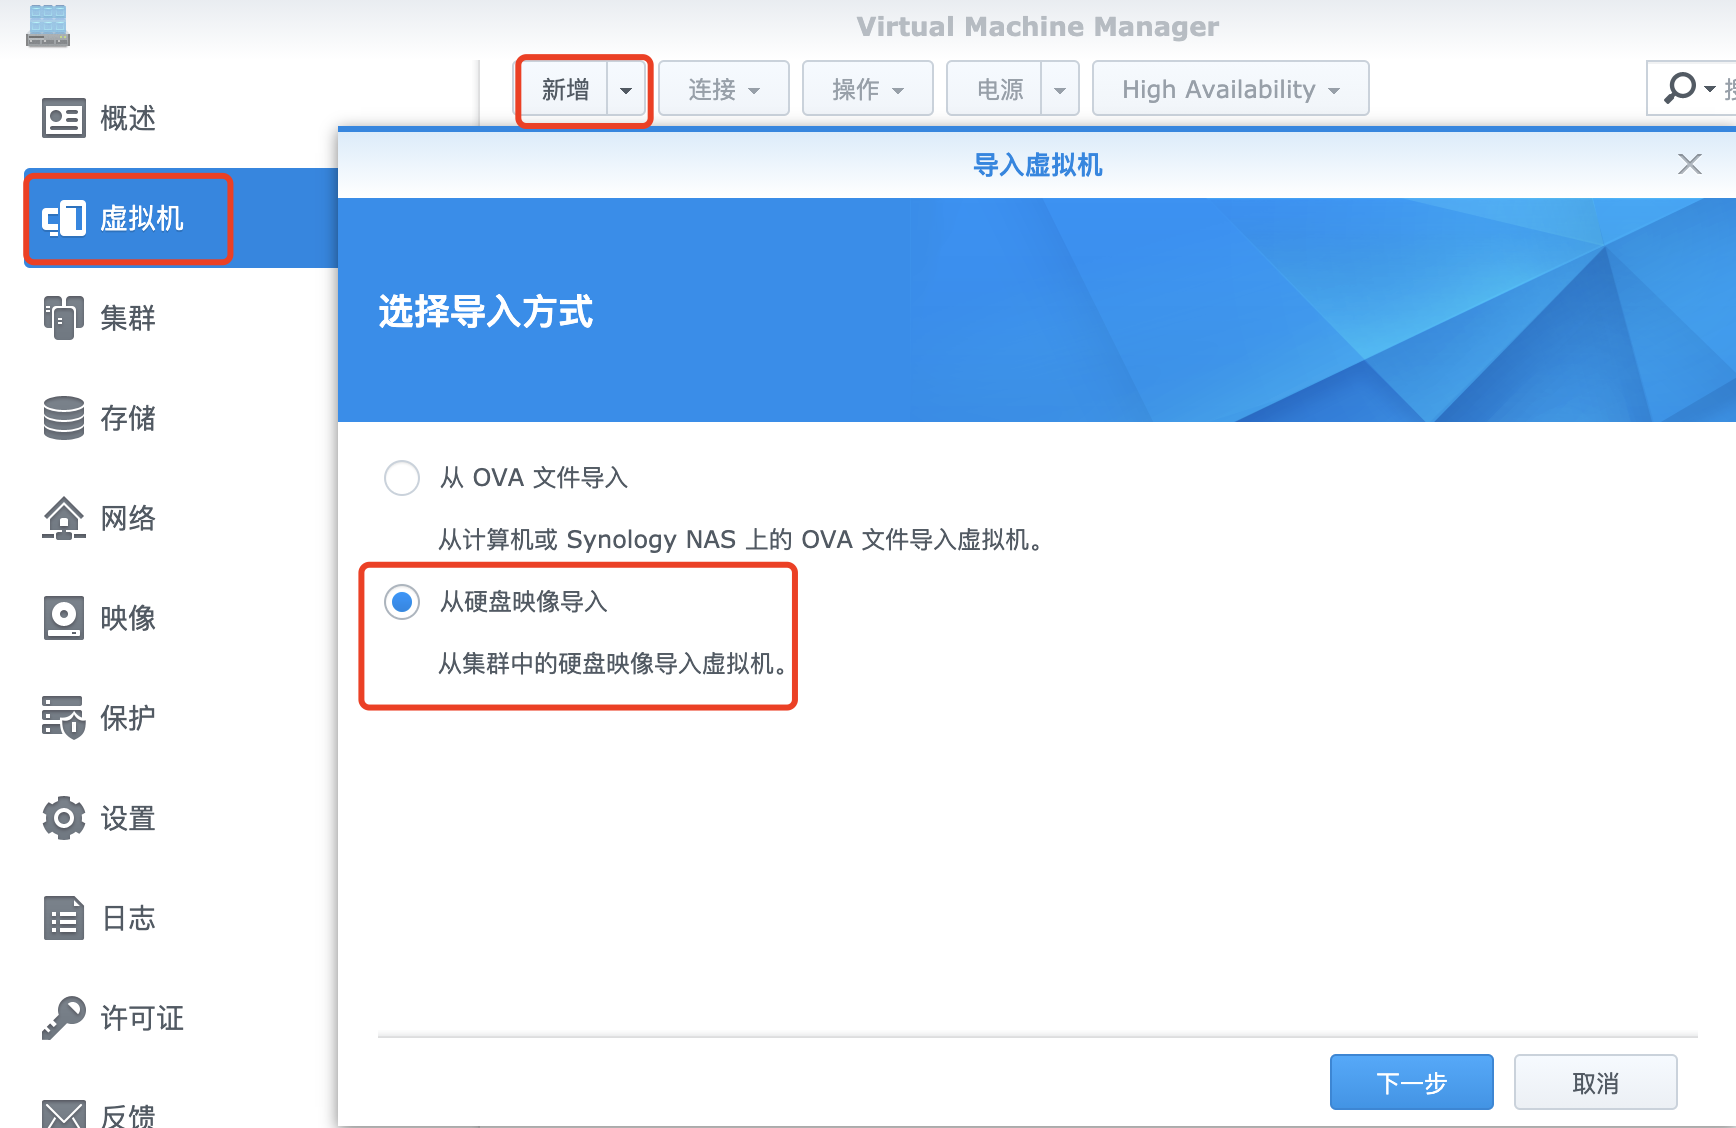
配置网络
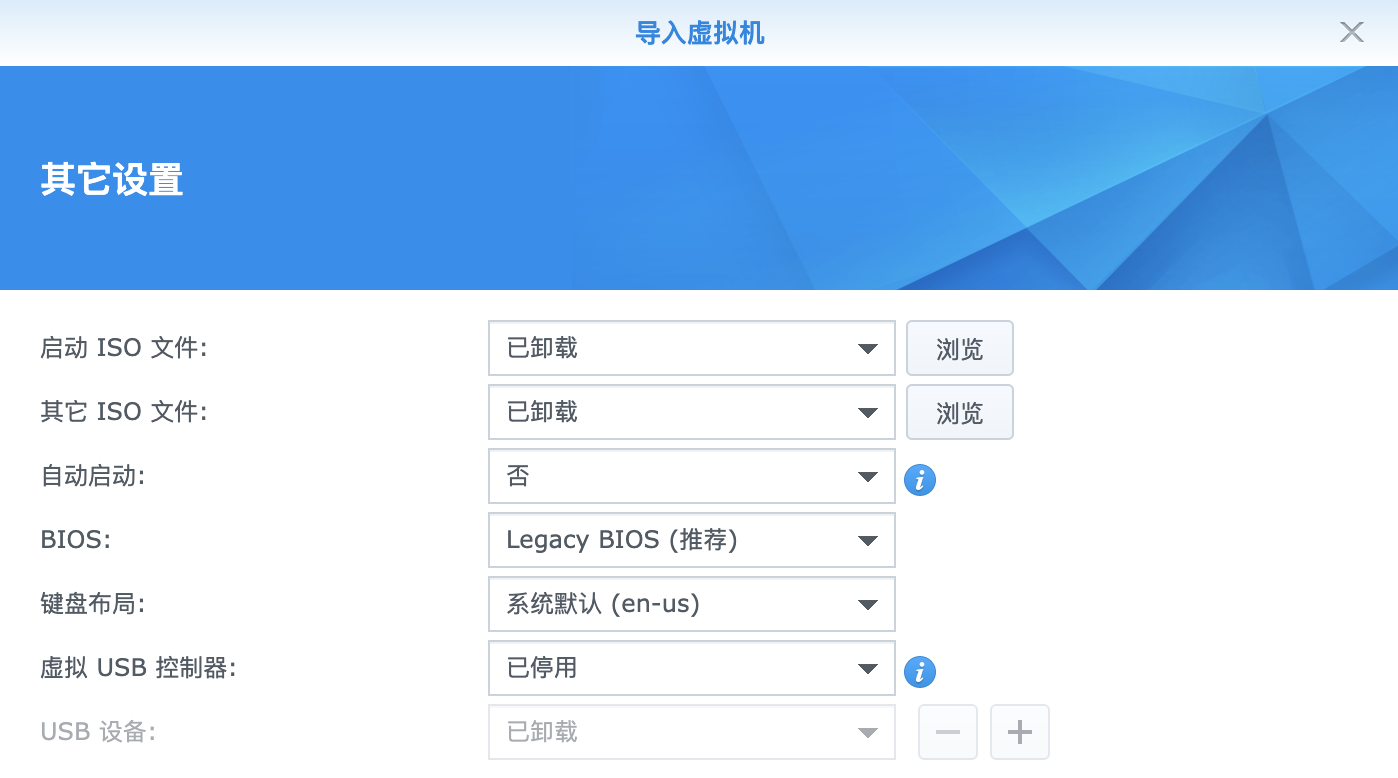
其他配置
开机
修改 IP
通过 VMM -> 虚拟机 -> 连接进入虚拟机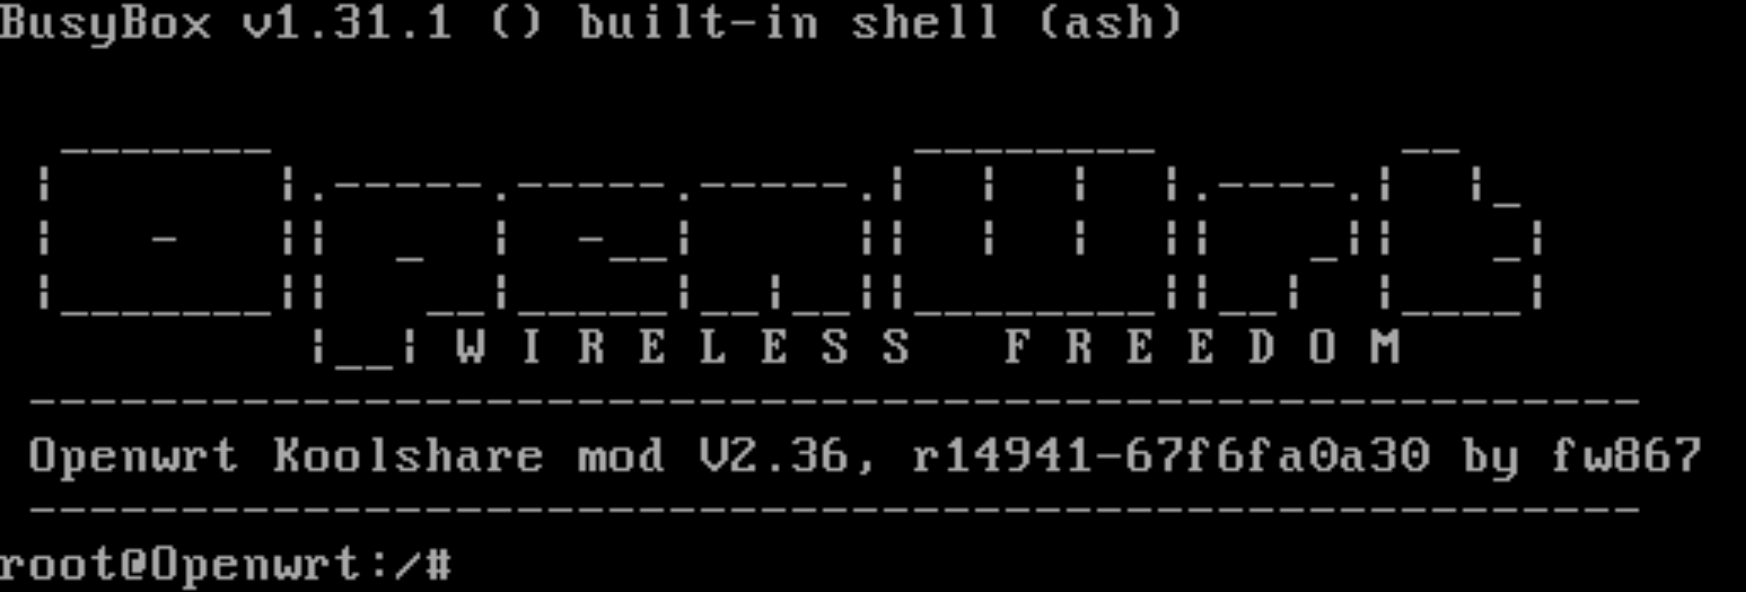
通过命令 vi /etc/config/network 来修改网络 IP 地址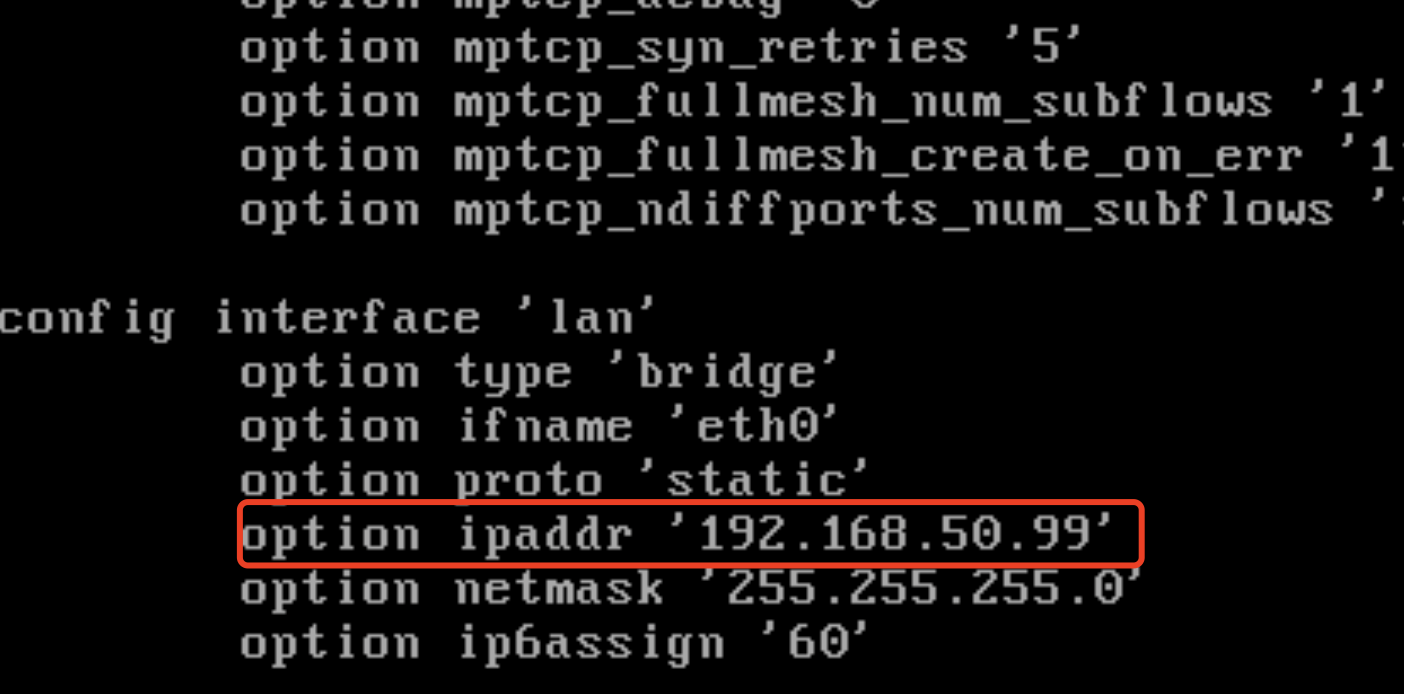
最后通过命令 /etc/init.d/network restart 来重启网络,或则 reboot 重启虚拟机
配置
关于 LEDE 的配置可以看看下面这篇文章
最后需要在路由器上修改路由器的网关和 DNS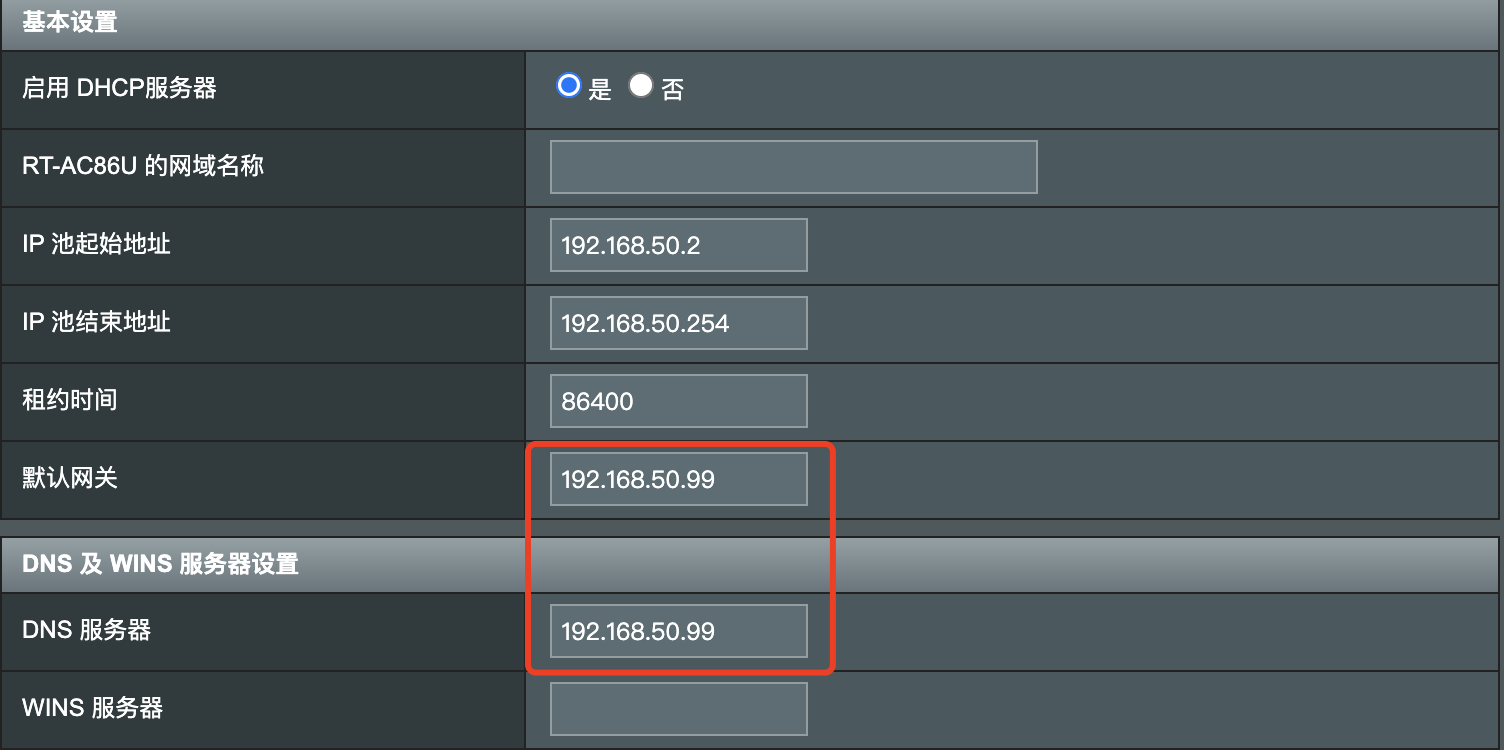
到这里 LEDE 旁路由的配置就完成了
怎么?ADGuard Home 客户端无法显示对应的设备?
前记
由于我的 ADGuard Home 是安装在群晖的 Docker 中的,对外服务是在路由器上设置的 DNS,DNS 请求如下
client->路由器->群晖->Docker->ADGuard Home
所以 ADGuard Home 的客户端列表只是显示了群晖 Docker 的网关地 172.17.0.1,没有显示具体的客户端 IP 地址,导致有很多请求都不知道是从哪个客户端发起的
解决
解决的办法就是将 ADGuard Home 所在的容器暴露到局域网中来,这就需要 Docker 的 Macvlan 网络实现方式
对于 Docker 的 3 种网络实现 Host、Bridge、Macvlan 可以参考这里
第一步
开启 Open vSwitch,Open vSwitch 的作用是开启虚拟网络交换机,通过软件实现交换机的作用
控制面板->网络->网络界面->管理->Open vSwitch设置->启用Open vSwitch
第二步
创建 Macvlan 模式网络,SSH 到群晖上
1 | docker network create -d macvlan --subnet=192.168.50.0/24 --gateway=192.168.50.1 --ip-range=192.168.50.100/31 -o parent=ovs_eth0 macvlan |
192.168.50.0/24 是路由器中 DHCP 的网段
192.168.50.1 是路由器管理 IP
192.168.50.100/31 是 Docker 可用 IP,此段为 100、101 可用
ovs_eth0 是群晖的网卡名称,可用 ip addr 查看
第三步
将 ADGuard Home 容器分配到 Macvlan 网络下
Docker->网络->macvlan->管理->新增
当然你也可以选择通过 Docker 命令的模式来创建容器指定网络
1 | docker run -d --restart=always --network macvlan --ip=192.168.50.50 --name nginx nginx |
问题
本来是 Bridge 下的一个 Frp 容器提供穿透服务,由于 Macvlan 下容器无法与宿主机通信,所以 ADGuard Home 管理平台也就无法穿透出外网
解决方案就是将 ADGuard Home 容器同时加入 Bridge 和 Macvlan 网络下,Bridge 映射端口到宿主机进行穿透,而 Macvlan 下的 IP 用来提供 DNS 服务
大功告成
将路由器上的 V2ray 客户端迁移到群晖 Docker 中
前记
之前一直是用华硕 AC86U 做 v2ray 做客户端,最近也想把它迁移到群晖中去,然后把路由器刷回官方固件
安装
因为是容器安装这里就一笔带过,官方容器镜像
需要注意的就一点,在高级设置 -> 网络 -> 使用与Docker Host相同的网络这里需要打勾
再一个就是配置文件 config.json 所在的文件夹必须挂载到 /etc/v2ray 下
配置
我电脑使用的是 V2rayU 客户端,直接配置导出即可使用。将 inbounds 中的 listen 改为 "listen": "0.0.0.0",
最后需要将 geoip.dat 和 geosite.dat 规则文件跟配置文件放在一起
使用
socks5:群晖IP:1080
http:群晖IP:1087
Adguard Home 自用规则备份
安装
由于我是在群晖安装的,安装比较简单,直接镜像 adguard/adguardhome 拉起来即可。
注意数据盘和端口就好
管理端口:3000:3000,另外 upd 和 tcp 端口:53:53
数据文件:/opt/adguardhome/work
配置文件:/opt/adguardhome/conf
Rules
1 | filters: |
适合懒人直接拷贝
Mac 下 Iterm2 配置的一些问题
agnoster 主题乱码
原因:是缺少 Menlo for Powerline 字体
下载字体:Menlo for Powerline
安装字体:mv "Menlo for Powerline.ttf" ~/Library/Fonts
配置:Text->Font
ls 文件夹颜色
配置:Colors->Brighten bold text 勾选掉之后
rz/sz 配置
zsh-autosuggestion 颜色与底色相同
更改 zsh-autosuggestion 颜色,在.zshrc 最后加入 ZSH_AUTOSUGGEST_HIGHLIGHT_STYLE='fg=5'。
隐藏用户名和主机名
在.zshrc 最后加入
1 | prompt_context() {} |
只显示用户名
在.zshrc 最后加入
1 | prompt_context() { |
只显示主机名
在.zshrc 最后加入
1 | prompt_context() { |
自定义
在.zshrc 最后加入
1 | prompt_context () { |
powerlevel10k
重新配置 p10k configure
参考
AC86U 创建虚拟内存 U 盘读写速度不够?
前记
AC86U 升级固件后挂载虚拟内存总是提示读写速度不够,新固件的读取速度要求 20M/s,写入速度要求 30M/s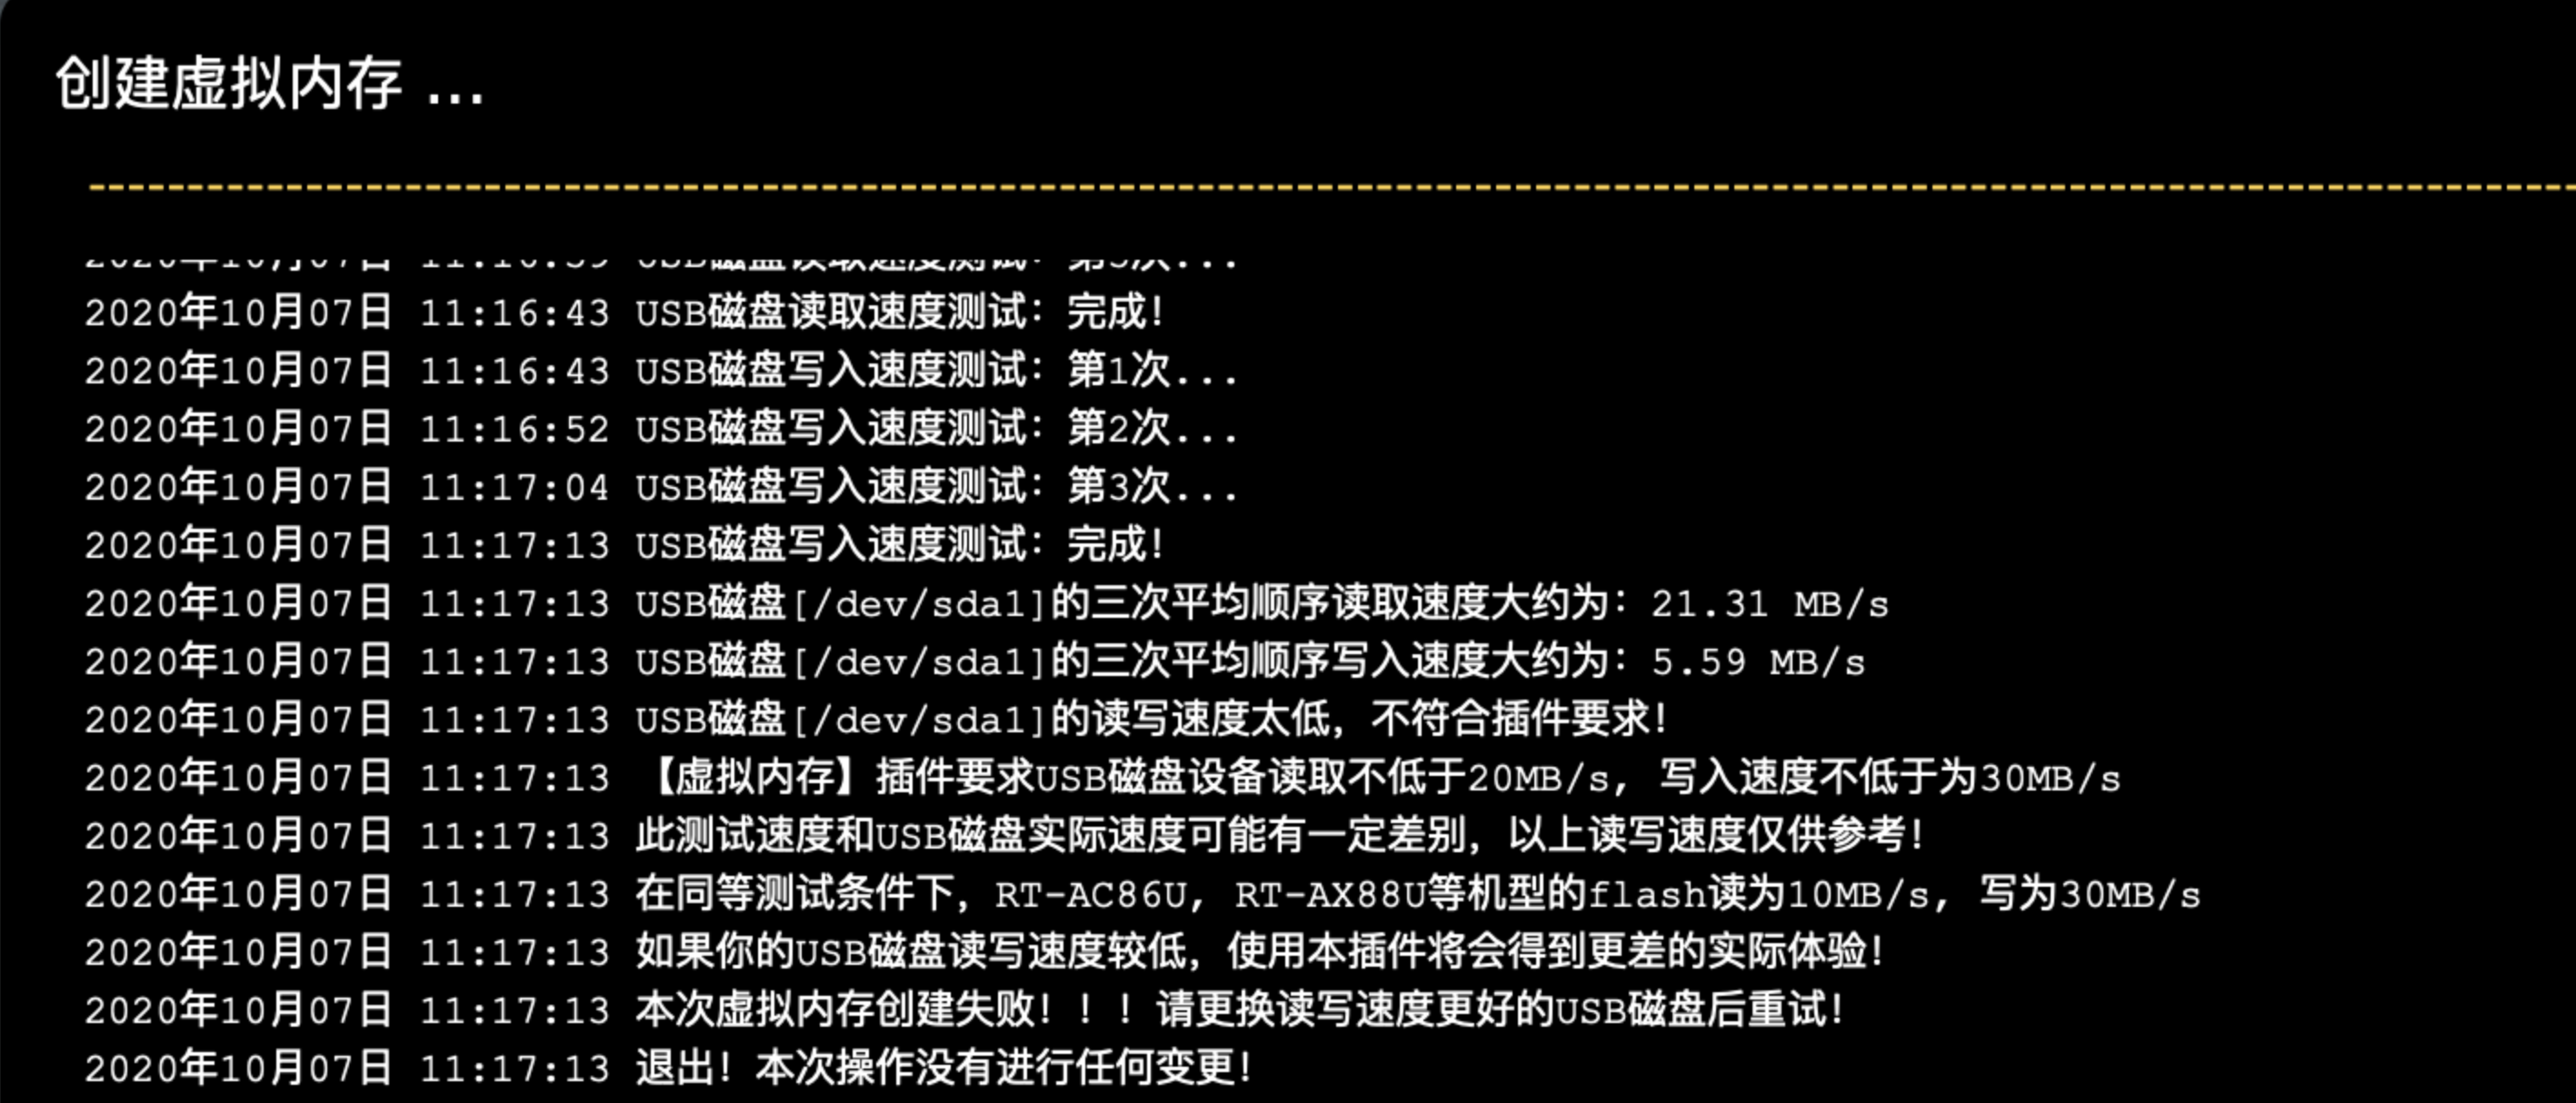
解决
修改参数限制
ssh 登录到路由器,执行如下命令
1 | # 修改写入速度限制,30替换为10 |
以上参数可以根据自己的实际情况进行调整
完成后重新进入管理界面挂载虚拟内存即可
Gogs 升级之殇
前记
搭建在群晖上的 gogs 还是 0.11.X 最近心血来潮升级到了 0.12.3 没想到升级后却出现了权限的问题 Permission denied 具体报错如下
1 | Permission denied (publickey,keyboard-interactive). |
解决
后查阅文档发现可能是目录权限问题,权限设置如下:
1 | /data/git/.ssh/ 目录权限为0700 |
最后需要在后台重新生成 /data/git/.ssh/authorized_keys 文件
管理面板->管理员操作->重新生成 '.ssh/authorized_keys' 文件(警告:不是 Gogs 的密钥也会被删除)
大功告成